Loading...
- This is a simple POC, where I have tried to built a simpler version of, bolt.new, which is a browser based dev sandbox powered with AI.
- My version is not super pretty but functional and working demo.
- I was fascinated by how
boltworked and since it was open source so I looked into the repo. - It opened up my mind to some new frameworks and I was excited to try it out myself.
- This POC:
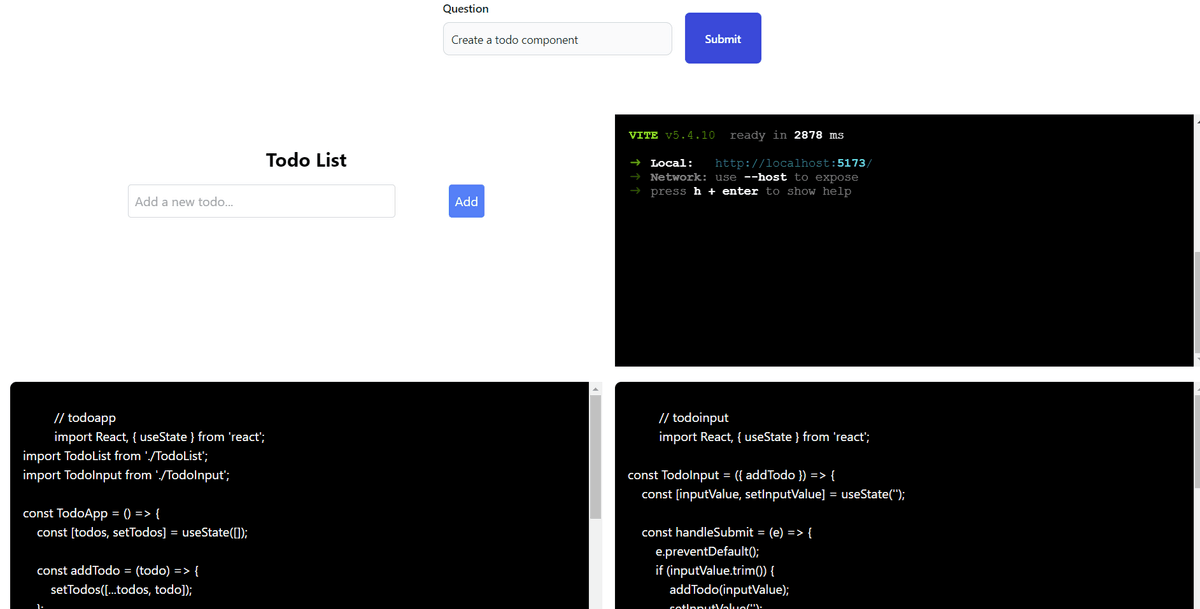
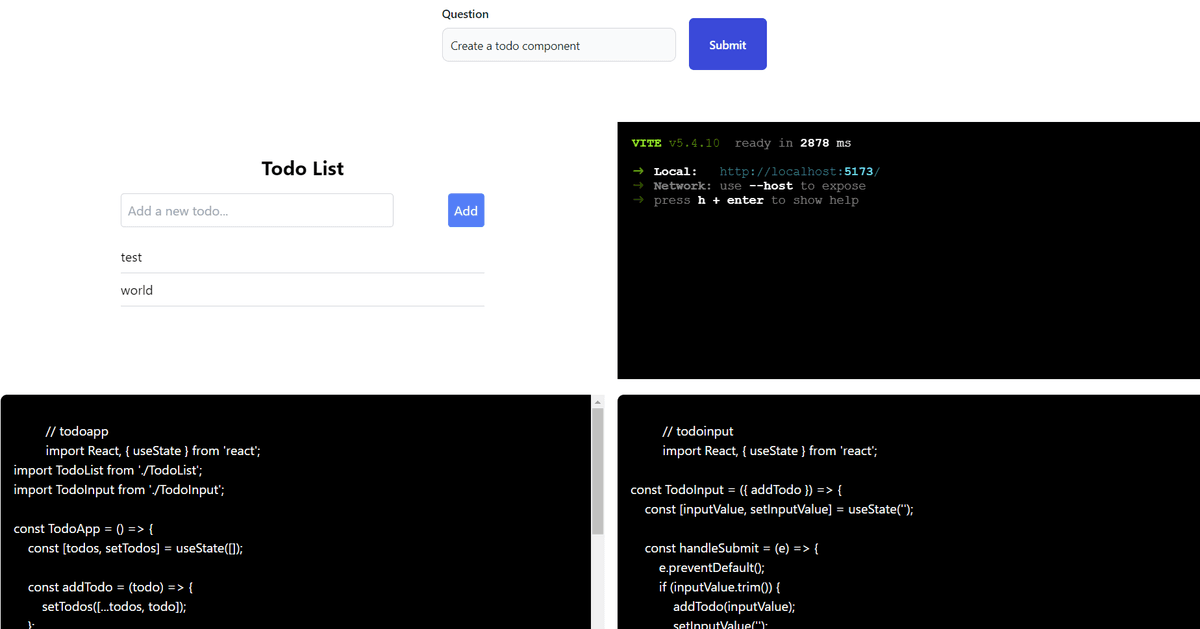
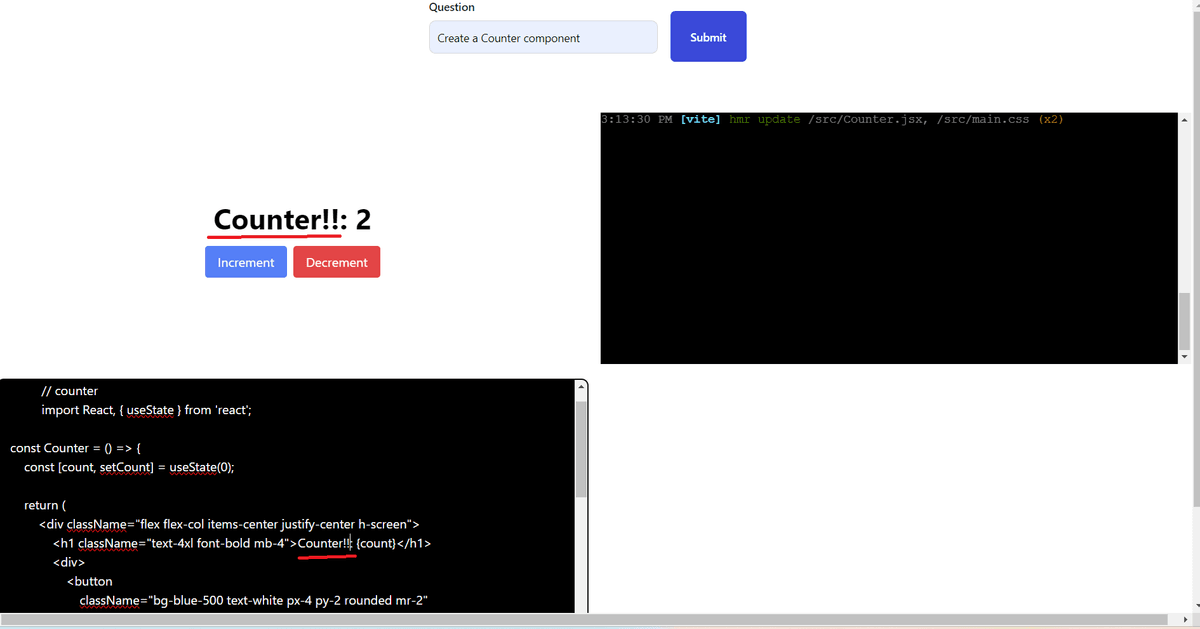
- lets user ask the AI to generate a React component
- Read and Update the code of the generated component in the text area.
- Interact with the Rendered component in a iFrame.
Internal Working
-
This is a simple NextJs App with a FE to render the UI and a BE route to integrate with the LLM.
-
Let's look at FE and BE individually:
-
Backend
- I have a simple route
/api/askthat takes in the user question and returns a list of component code. - Since it's a chat bot style flow, to manage the messages I have used two functions
convertUIMessageToLangChainMessageandconvertLangChainMessageToUIMessagethat converts the messages from LangChain format to what UI can understand and vice versa.
// UI format const uiMessages = [ { content: "Hello", role: user, }, ]; // LangChain format message const langchaninMessages = [new HumanMessage("Hello")];- For integrating with the LLM I have a simple chain
// JSON format I want the LLM output to be in type File = { content: string; language: string; name: string; }; // JSON parser to format AI output in certain JSON format const parser = new JsonOutputParser<File[]>(); const llm = new ChatOpenAI({ model: "gpt-4o-mini", temperature: 0, }); const chain = promptTemplate.pipe(llm).pipe(parser);- The
promptTemplateis where we provide instruction to the LLM on what role we want it to take and how to respond.
- I have a simple route
-
FrontEnd
- The UI is simple it has a
formthat contains the button and input element. - The user types in the question and submits, which then calls the BE API.
- The real magic happens once the response from the BE is returned.
- I had to parse, compile and then render it on an iFrame.
- For all of it I used a fancy library called
@webcontainerby amazingstackblitzto render and compile the content and for the terminal I have used@xterm. - The
@webcontainerlibrary usesWebContainer API, which is a browser-based runtime for executing Node.js applications and operating system commands. - The main crux is the
filesformat that gets mounted into the container. That's how we tell the container about our file system. - Here is an example of a
indexfile to run a node server
export const files = { "index.js": { file: { contents: ` import express from 'express'; const app = express(); const port = 3111; app.get('/', (req, res) => { res.send('Welcome to a WebContainers app!!!! 🥳'); }); app.listen(port, () => { console.log(\`App is live at http://localhost:\${port}\`); });`, }, }, };- Each file in our file system is a new key value pair in the
filesobject. - I have used a
vitebased skeleton to compile and render the content returned by the LLM. - So you will notices that the
files.jsin my case has certain predefined files that are needed for aviteapp to bootstrap and run. - The actual code is what the LLM returns and I have a function to add it to the
filesobject and create the required textArea to render them.
// sample code // loop over the ids extracted from the llm response ids.forEach((id) => { // find the object from the resposne to extract content const fileData = filesNeeded.filter((d) => d.name.toLocaleLowerCase().includes(id) ); // append the content to the files object under src directory files["src"]["directory"][fileData[0].name] = { file: { contents: id == "main" ? ` import "./main.css"; \n ${fileData[0].content} ` : fileData[0].content, }, }; if (id !== "main") { const textareaEl = document.getElementById(id)! as HTMLTextAreaElement; // load content in textarea textareaEl.value = ` // ${id} ${fileData[0].content} `; // add event listener to change for text area const filePath = `src/${fileData[0].name}`; textareaEl.addEventListener("input", (e: Event) => { writeIndexJS( webContainer, filePath, (e.currentTarget as HTMLInputElement).value ); }); } }); - The UI is simple it has a
-
Local Development
_ Note _ please update the OPEN AI key in the .env.local file
- To try out the app locally, run the following commands:
npm install- this will install the required deps.npm run dev- this will start the local dev server.
UI